
Here is an example of how you can build up a changelog from Huma by using the Webhook integration.
⚠️ Important!
This is an example and Huma doesn't guarantee it works.
We recommend having a developer with the technical knowledge to assist you when setting up the Webhook integration.
A Webhook can be used in various situation and this is just one example. You can read more about Webhooks and what is supported here.
🔔🛡️ Remember to save any such excel sheet with the correct access control according to GDPR, as this is personal information.
Table of content
- What is a changelog?
- Step 1: Create a Zapier* account
- Step 2: Set up a Zap and create a trigger
- Step 3: Set up integration in Huma
- Step 4: Test the Trigger and create an Action
- Step 5: Receive the data in Excel
- Step 6: Test the integrations
What is a changelog?
A changelog will give you a list of changes made on the users profile in Huma. This will let you have control over what kind of information that has been changed and when.
Example:
An employee updates their Bank Account Number or adding their National identification number (personnummer) - those changes will be sent to the changelog with information.
In this example we will use Microsoft Excel as the receiver of the changes in Huma. There are a lot of other services that support webhooks - such as Google Drive, Slack, Teams +++ but for this example we'll use Microsoft Excel.
Step 1: Create a Zapier* account
Go to Zapier and create an account. For this example you need to be on the Professional plan to have the required features.
*Zapier is a web-based automation tool that allows users to connect different web applications and automate workflows between them, without requiring any coding skills. It allows users to create "Zaps," which are automated workflows that trigger actions in one app based on events that occur in another app. Zapier supports thousands of different apps, including popular ones like Gmail, Trello, Slack, and more.
Step 2: Set up a Zap and create a trigger
A Zap contains different steps that allow you to send data between different systems.
- Click "Create zap"
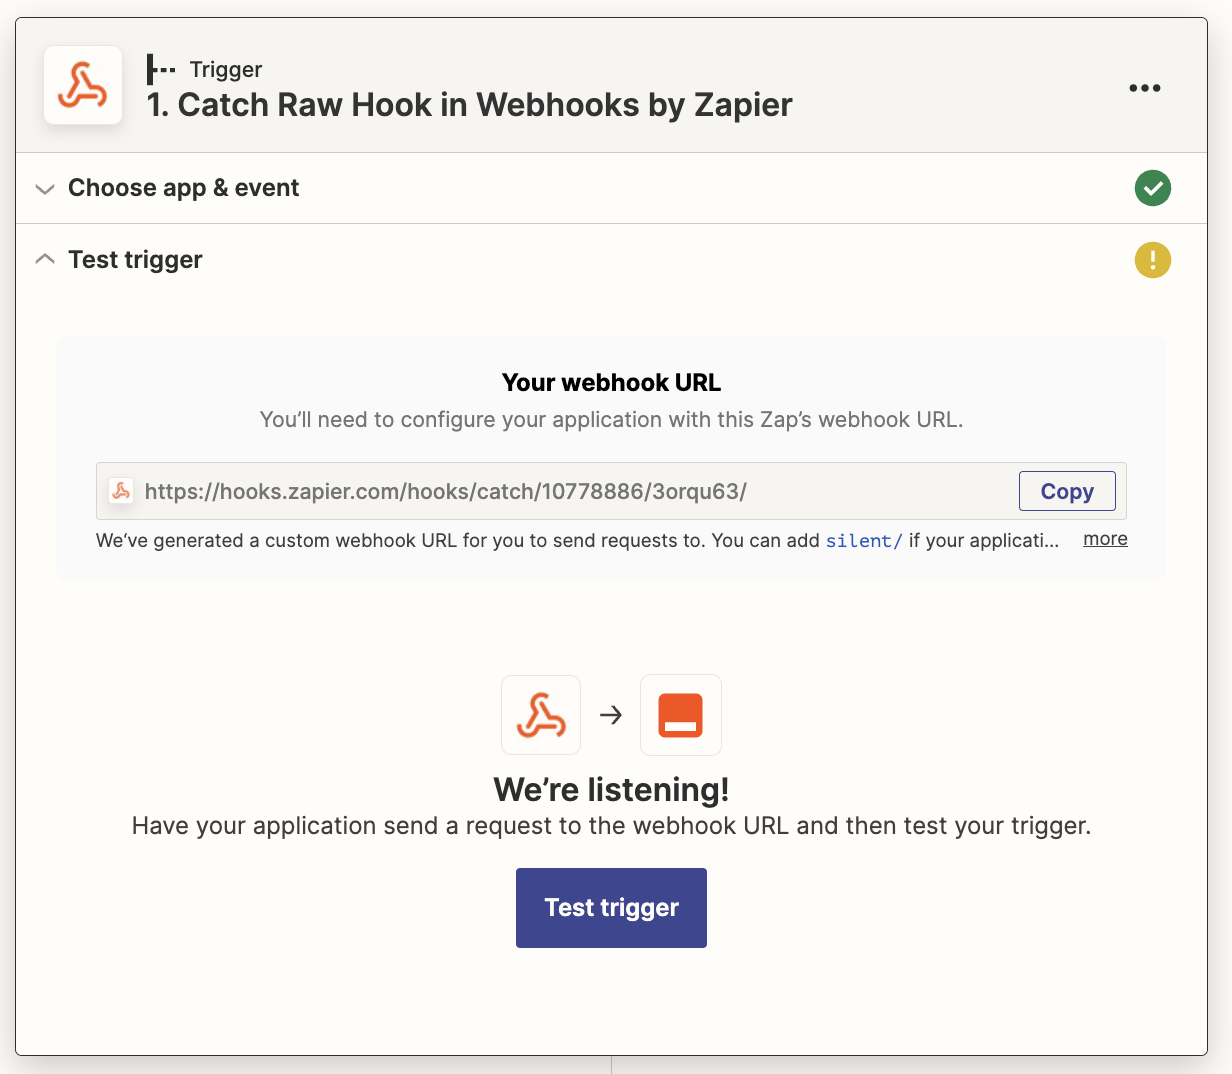
- Choose "Webhooks by Zapier"
- Select "Chatch Raw Hook" as "Event" and click Continue
- Copy the Webhook URL
Step 3: Set up integration in Huma
- Open your Huma account
- Go to "System settings" > "Integrations"
- Choose "Webhooks" and click the Connect-button in the upper right corner
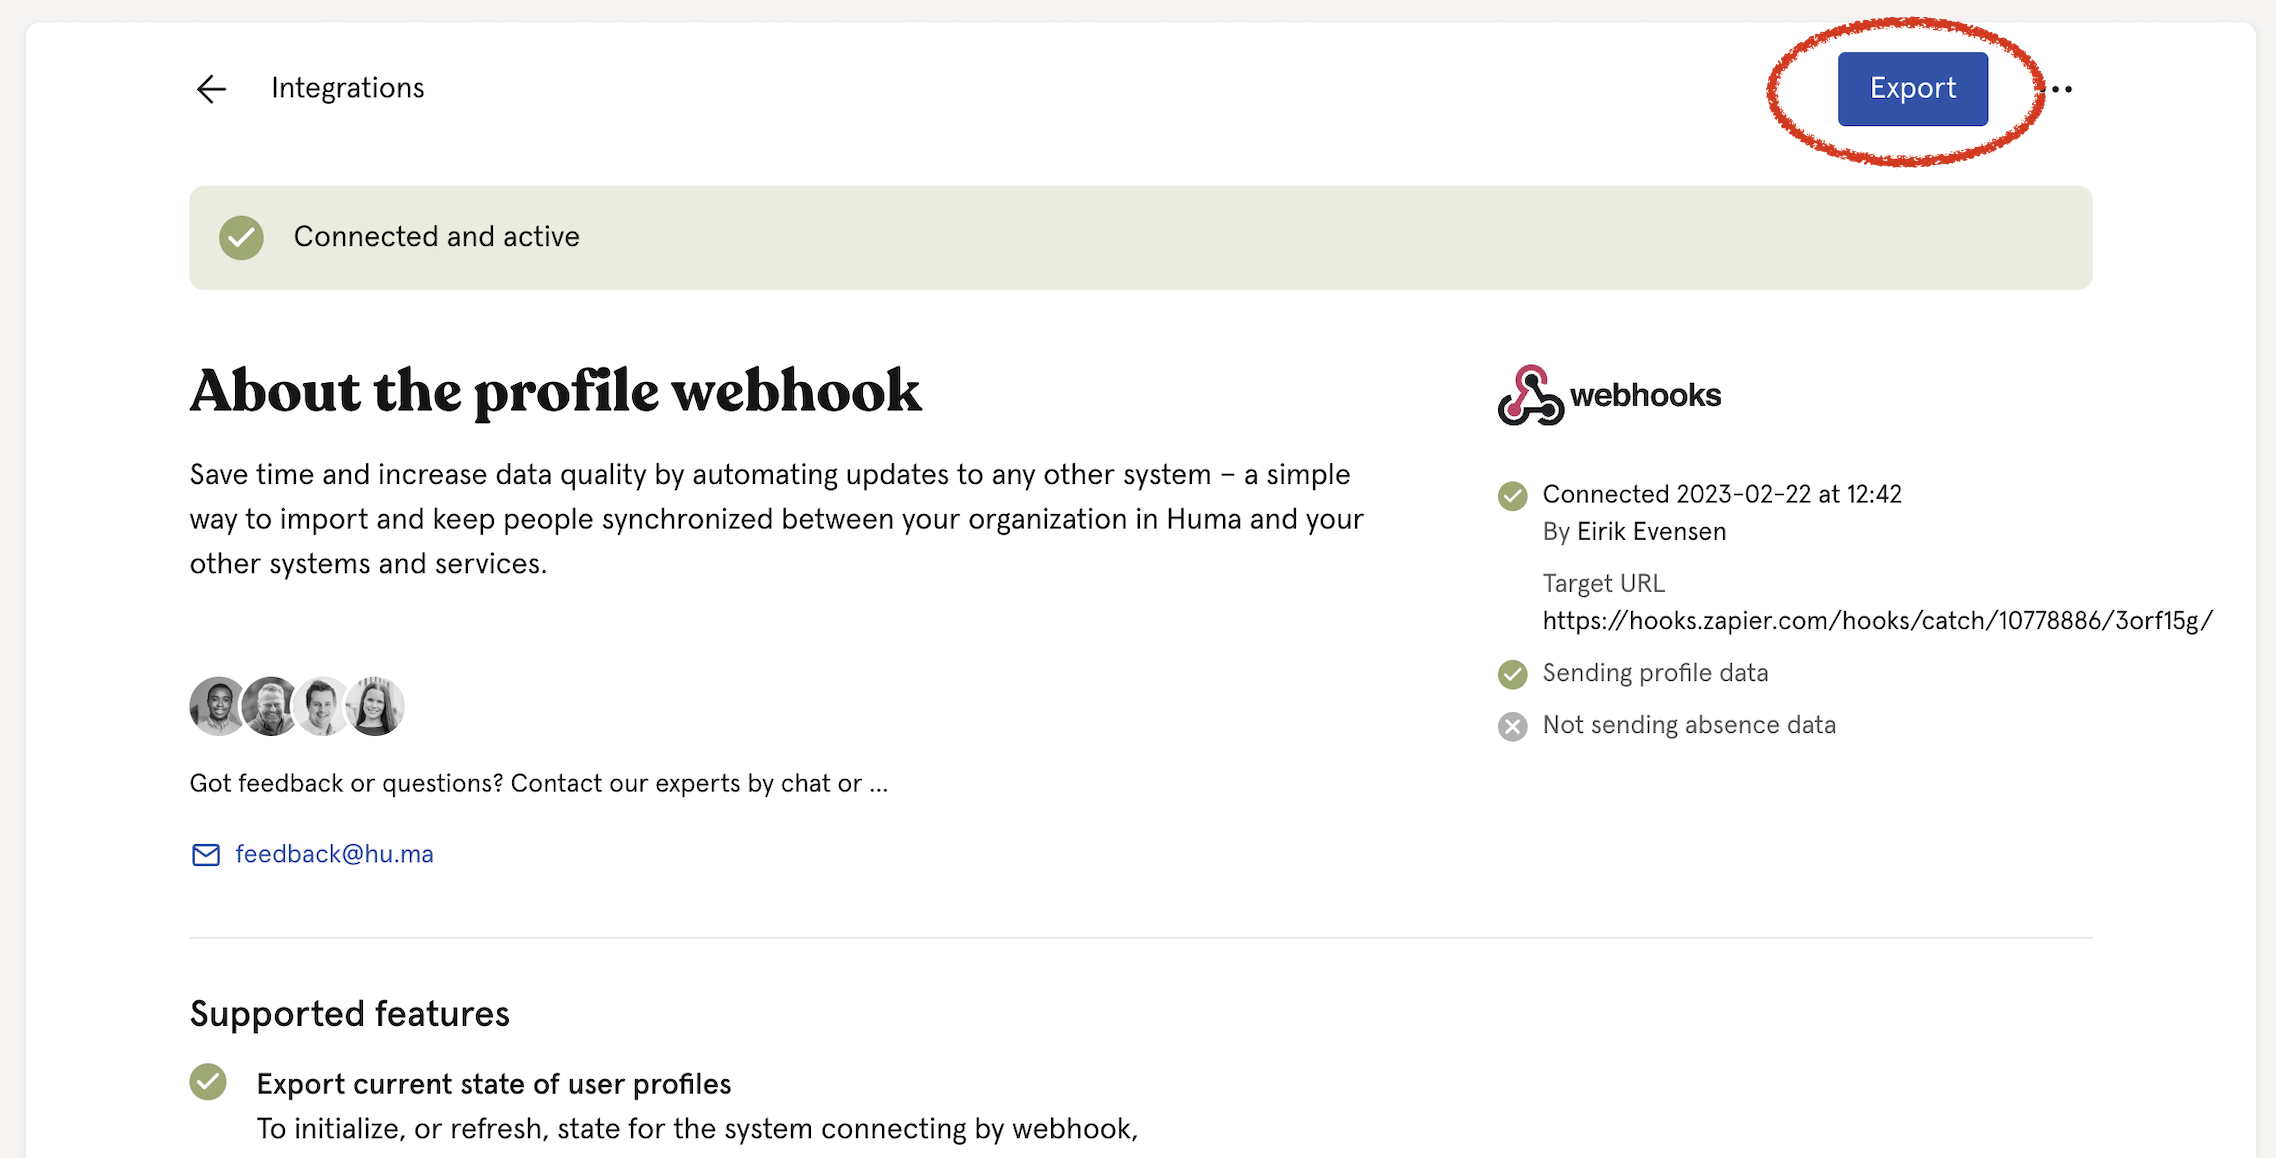
- Paste the "Webhook URL" in the "Target URL" field
We recommend to also add a client secret or access token for more security - Toggle "Send profile data"
In this example we only going to receive changes on profile data - Read the Terms of Service and click "Connect"

- You should now have a active connection between the Webhook URL and your Huma organization.
- Click "Export" and continue to the next step.
Step 4: Test the Trigger and create an Action
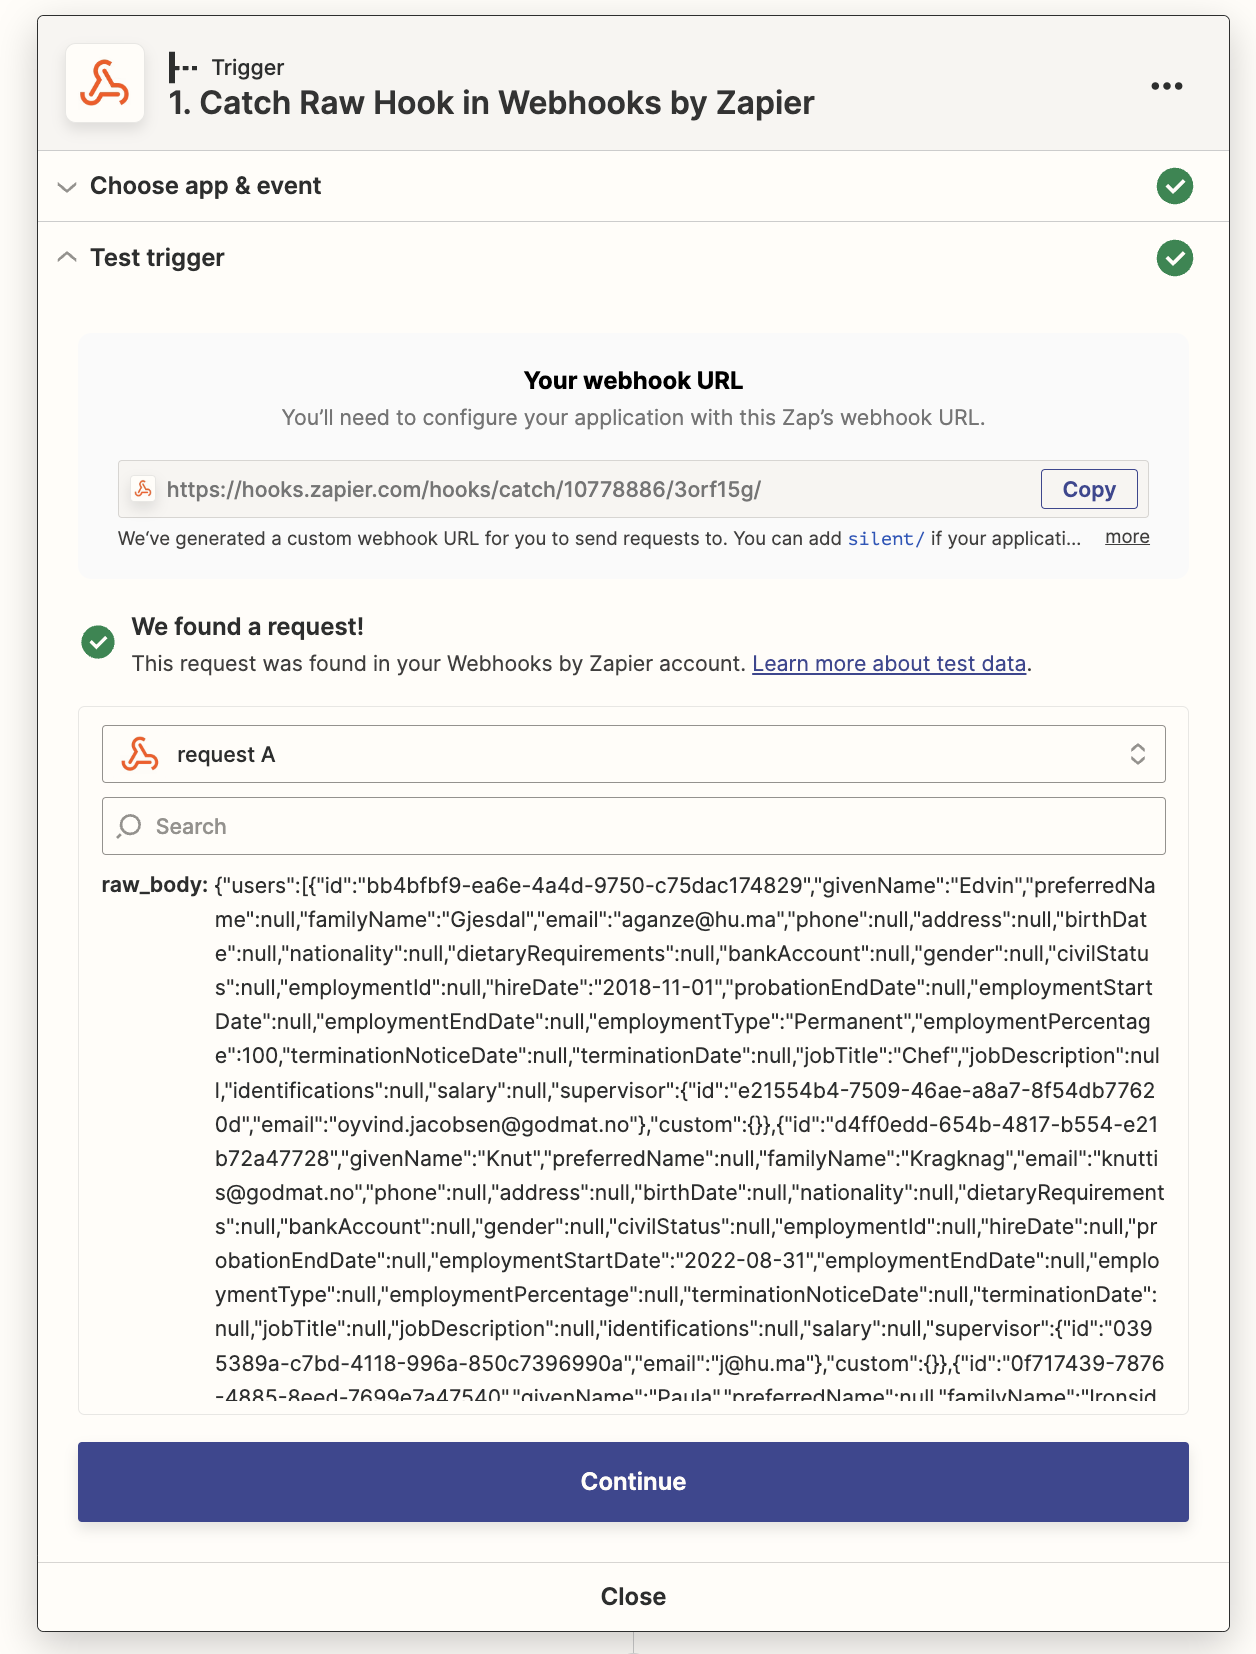
- Go back to Zapier and test the Trigger. You should now have a request that looks something like this:
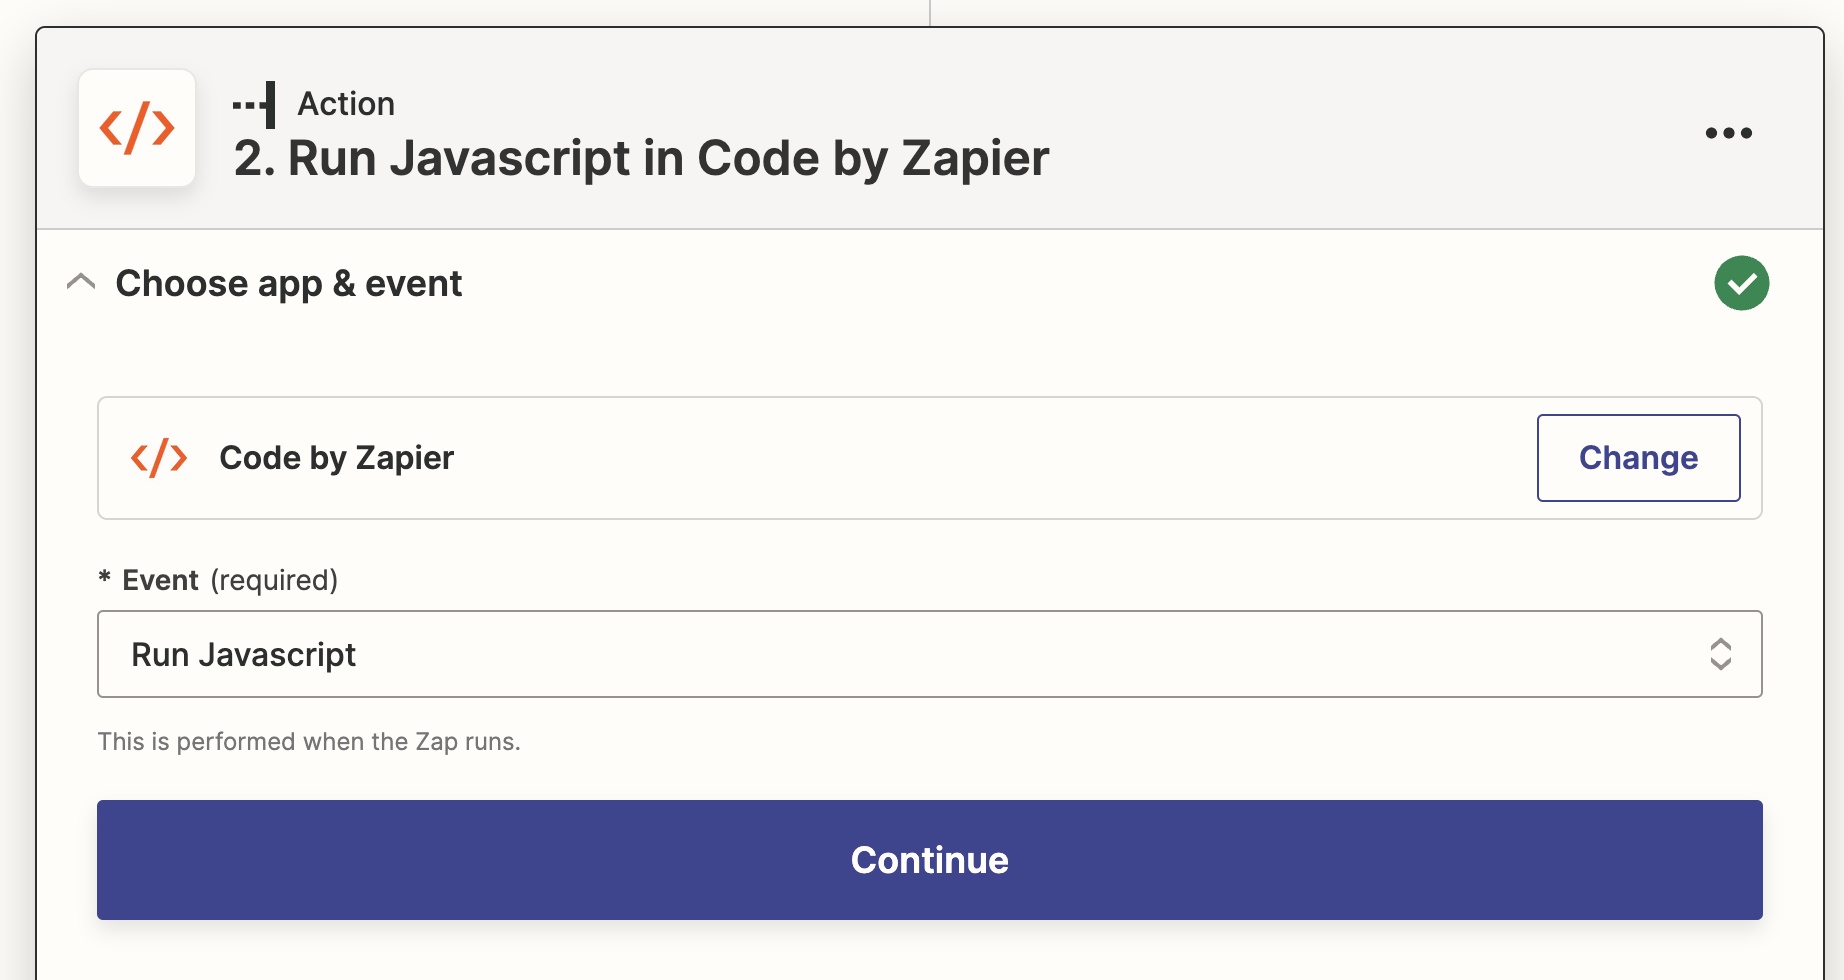
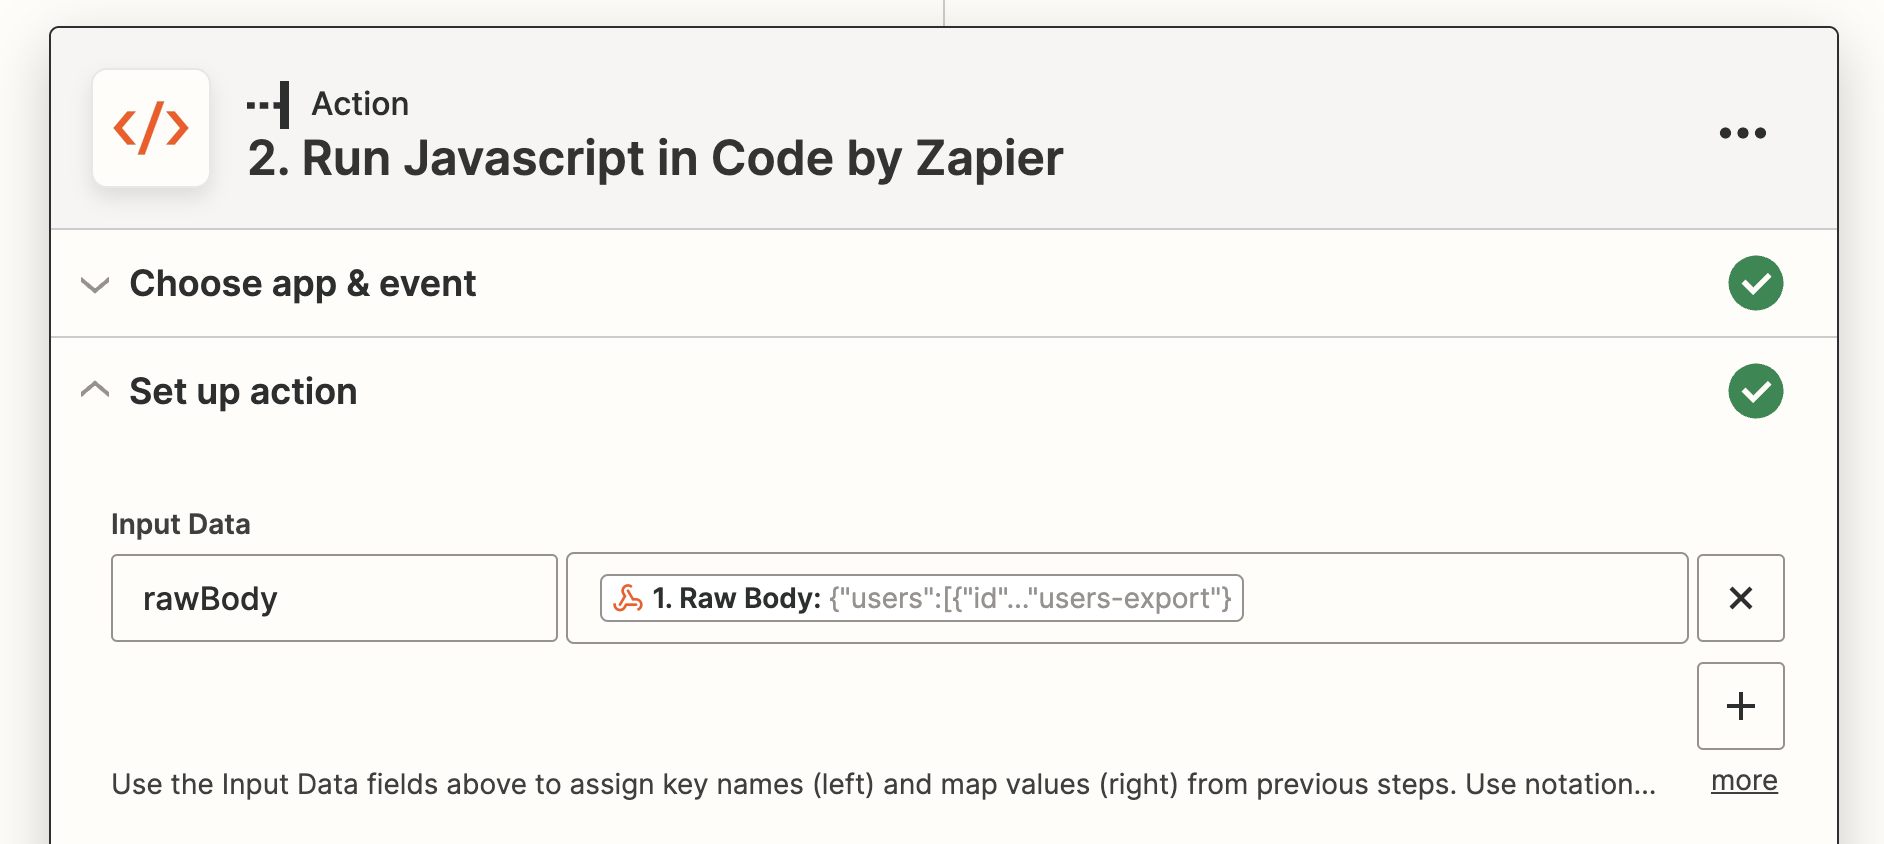
- Continue and add "Code by Zapier" as Action and "Run Javascript" as Event
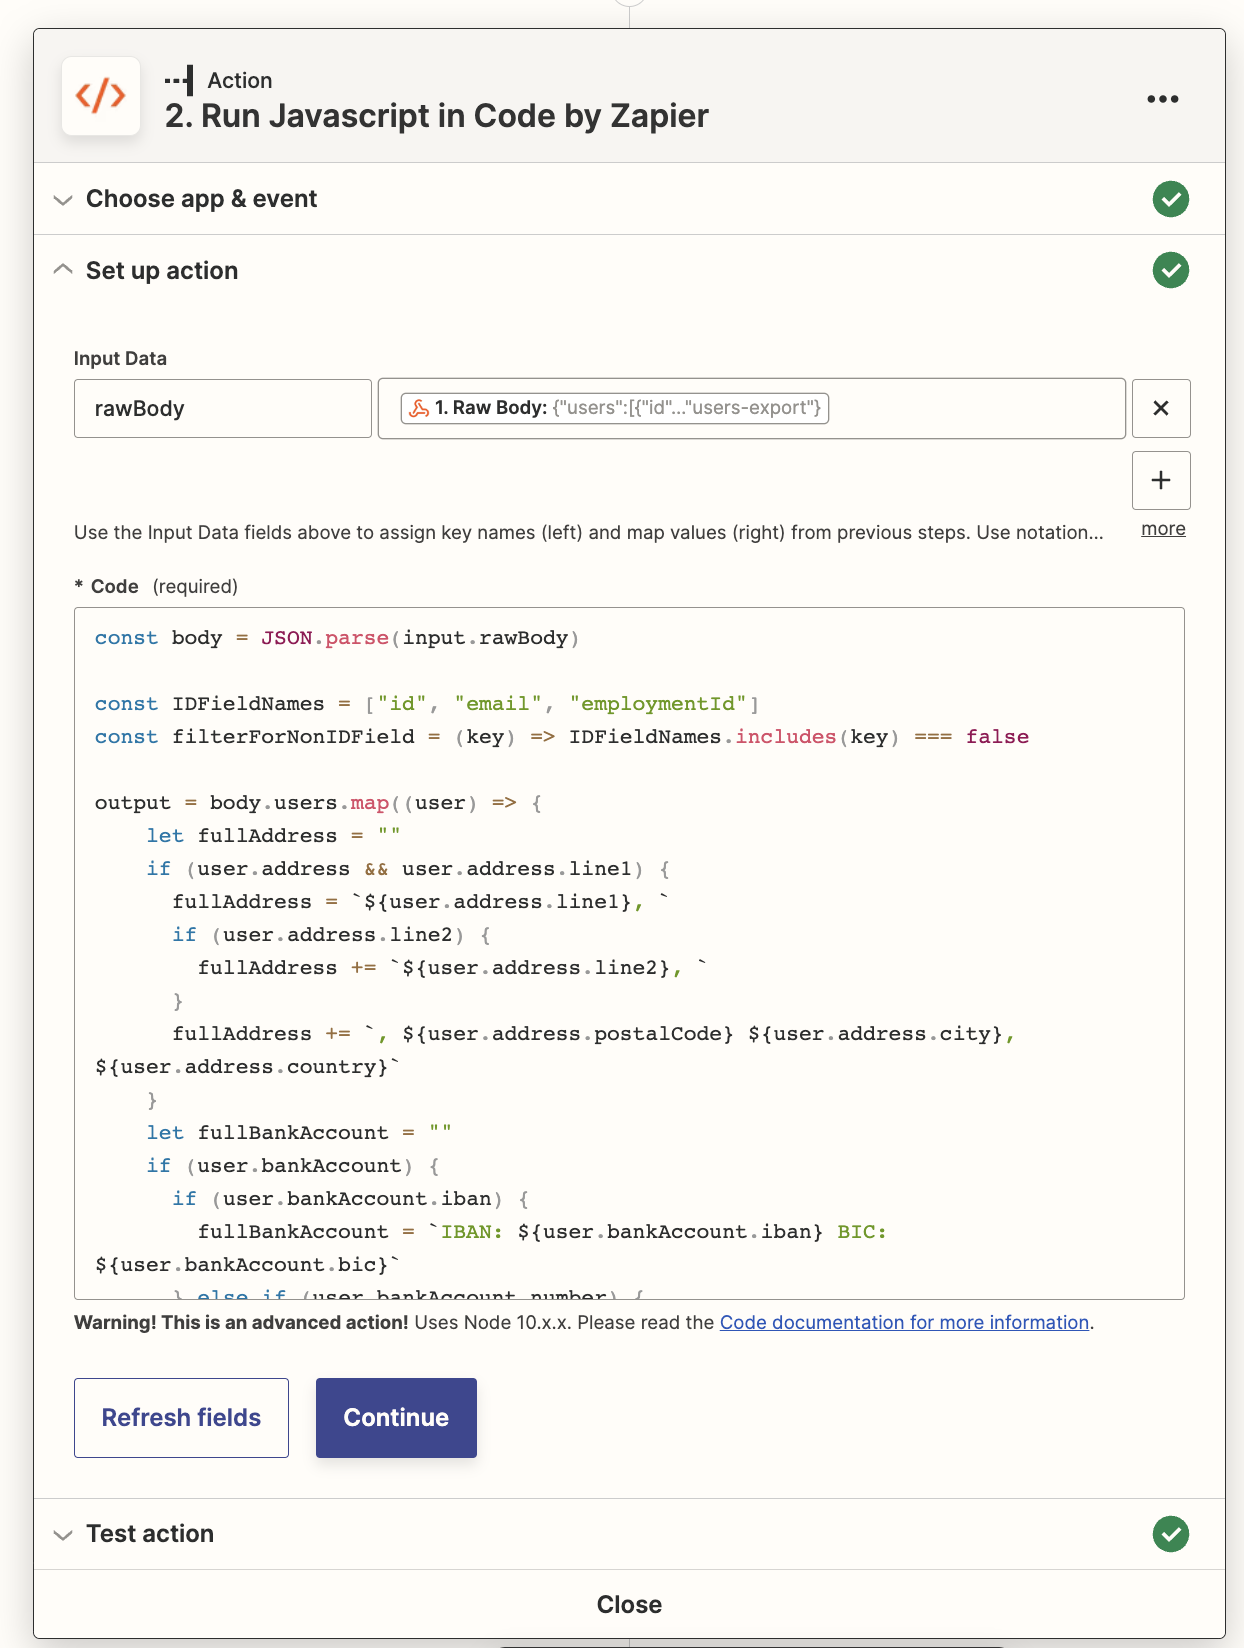
- Continue to "Set up action" and add `rawBody` choose the `1. Raw body` request as Input Data
- Paste the following Javascript code:
const body = JSON.parse(input.rawBody)

const IDFieldNames = ["id", "email", "employmentId"]

const filterForNonIDField = (key) => IDFieldNames.includes(key) === false

output = body.users.map((user) => {

    let fullAddress = ""

    if (user.address && user.address.line1) {

      fullAddress = `${user.address.line1}, `

      if (user.address.line2) {

        fullAddress += `${user.address.line2}, `

      }

      fullAddress += `, ${user.address.postalCode} ${user.address.city}, ${user.address.country}`

    }


    let fullBankAccount = ""

    if (user.bankAccount) {

      if (user.bankAccount.iban) {

        fullBankAccount = `IBAN: ${user.bankAccount.iban} BIC: ${user.bankAccount.bic}`

      } else if (user.bankAccount.number) {

        fullBankAccount = `${user.bankAccount.country} ${user.bankAccount.number}`

      }

    }


    let supervisor = ""

    if (user.supervisor && user.supervisor.email) {

      supervisor = `${user.supervisor.email}`

    }


    let nationalIdNumber = []

    let passportNumber = []

    if (user.identifications) {

      for (const identification of user.identifications) {

        if(identification.type === "national") {

          nationalIdNumber.push(identification.value+ ' '+identification.country)

        }

        if(identification.type === "passport") {

          passportNumber.push(identification.value+ ' '+identification.country)

        }

      }

    }


    let action = "event"

    let updatedFields = []

    if (body.topic === "users-export") {

      action = "Export users"

      //return {} //don't add rows when exporting users

    } else if (body.topic === "users-create") {

      action = "Add user"

    } else if (body.topic === "users-delete") {

      action = "Remove user"

    } else if (body.topic === "users-update") {

      action = "Update user"

      const properties = Object.keys(user)

      updatedFields = properties.filter(filterForNonIDField)

    }

    return {

      topic: body.topic,

      action, //human readable even (what kind of action is this)

      date: new Date().toLocaleString('no-NO', {timeZone: "Europe/Oslo"}),

      ...user,   //Include everything from the object

      phone: (user.phone || "").replace(/\s/g, ""),  //Remove white space

      fullAddress,

      fullBankAccount,

      fullName: (user.familyName && `${user.familyName}, ${user.givenName}`) || '',

      updatedFields: updatedFields.join(", "),

      supervisor,

      nationalIdNumber: nationalIdNumber.join(", "),

      passportNumber: passportNumber.join(", "),

      custom: JSON.stringify(user.custom), //all custom fields are sent to excel as a string

      //salary: JSON.stringify(user.salary), //Do you want to send salary??

    }

}) - Now you have something like this:
- Test the action and continue to the next step
Step 5: Receive the data in Excel
- Add a new action by clicking the + under your previous action
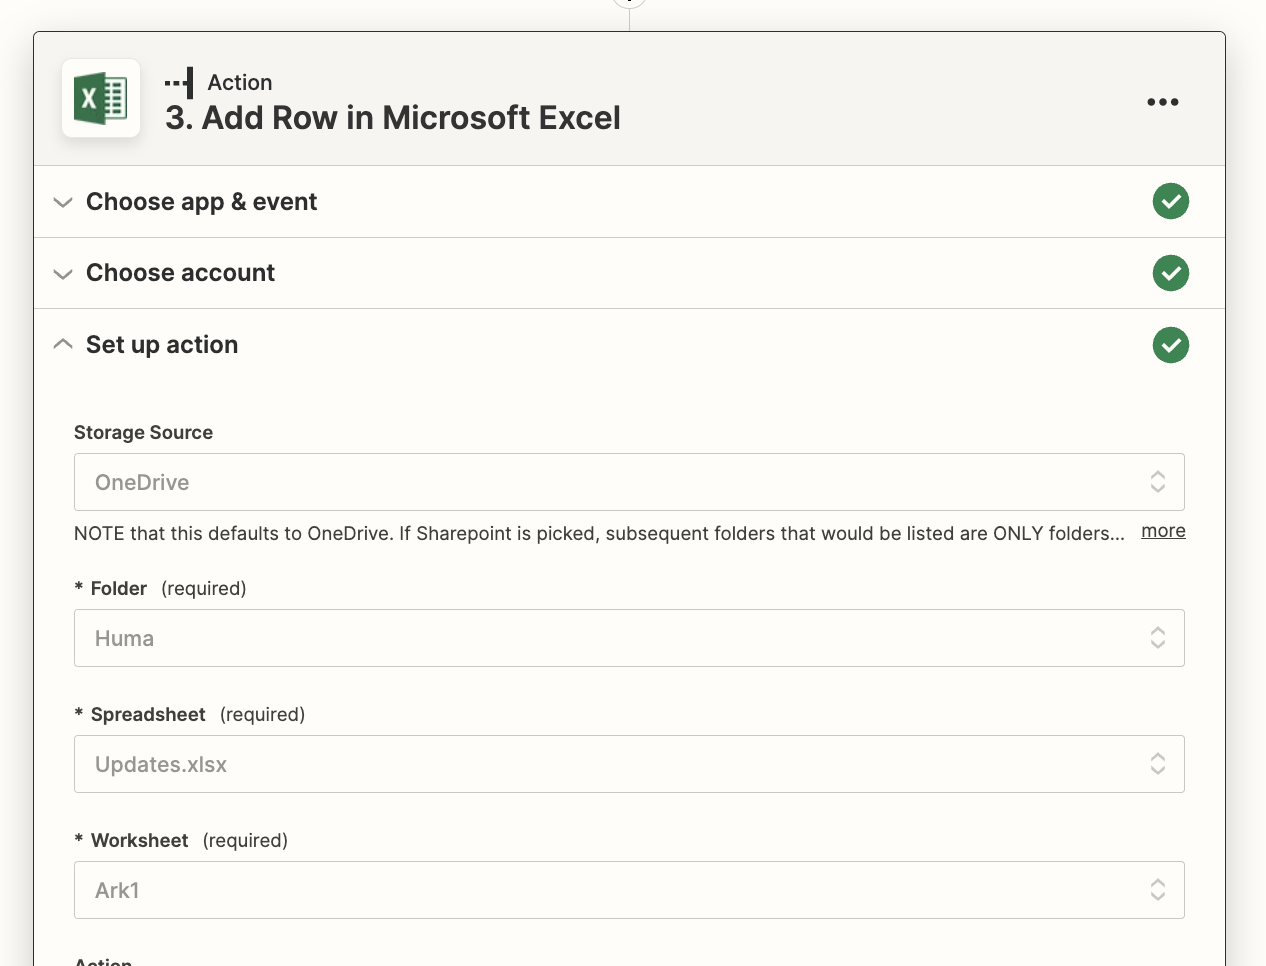
- Choose "Microsoft Excel" and "Add row" as Event and press continue
Every new event from Huma will create a new row in the Excel sheet - Connect it to your Microsoft Excel account and press continue
- Download our Excel Spreadsheet here. This needs to be added to your OneDrive.
- Choose the Spreadsheet and Worksheet you want your changelog in.
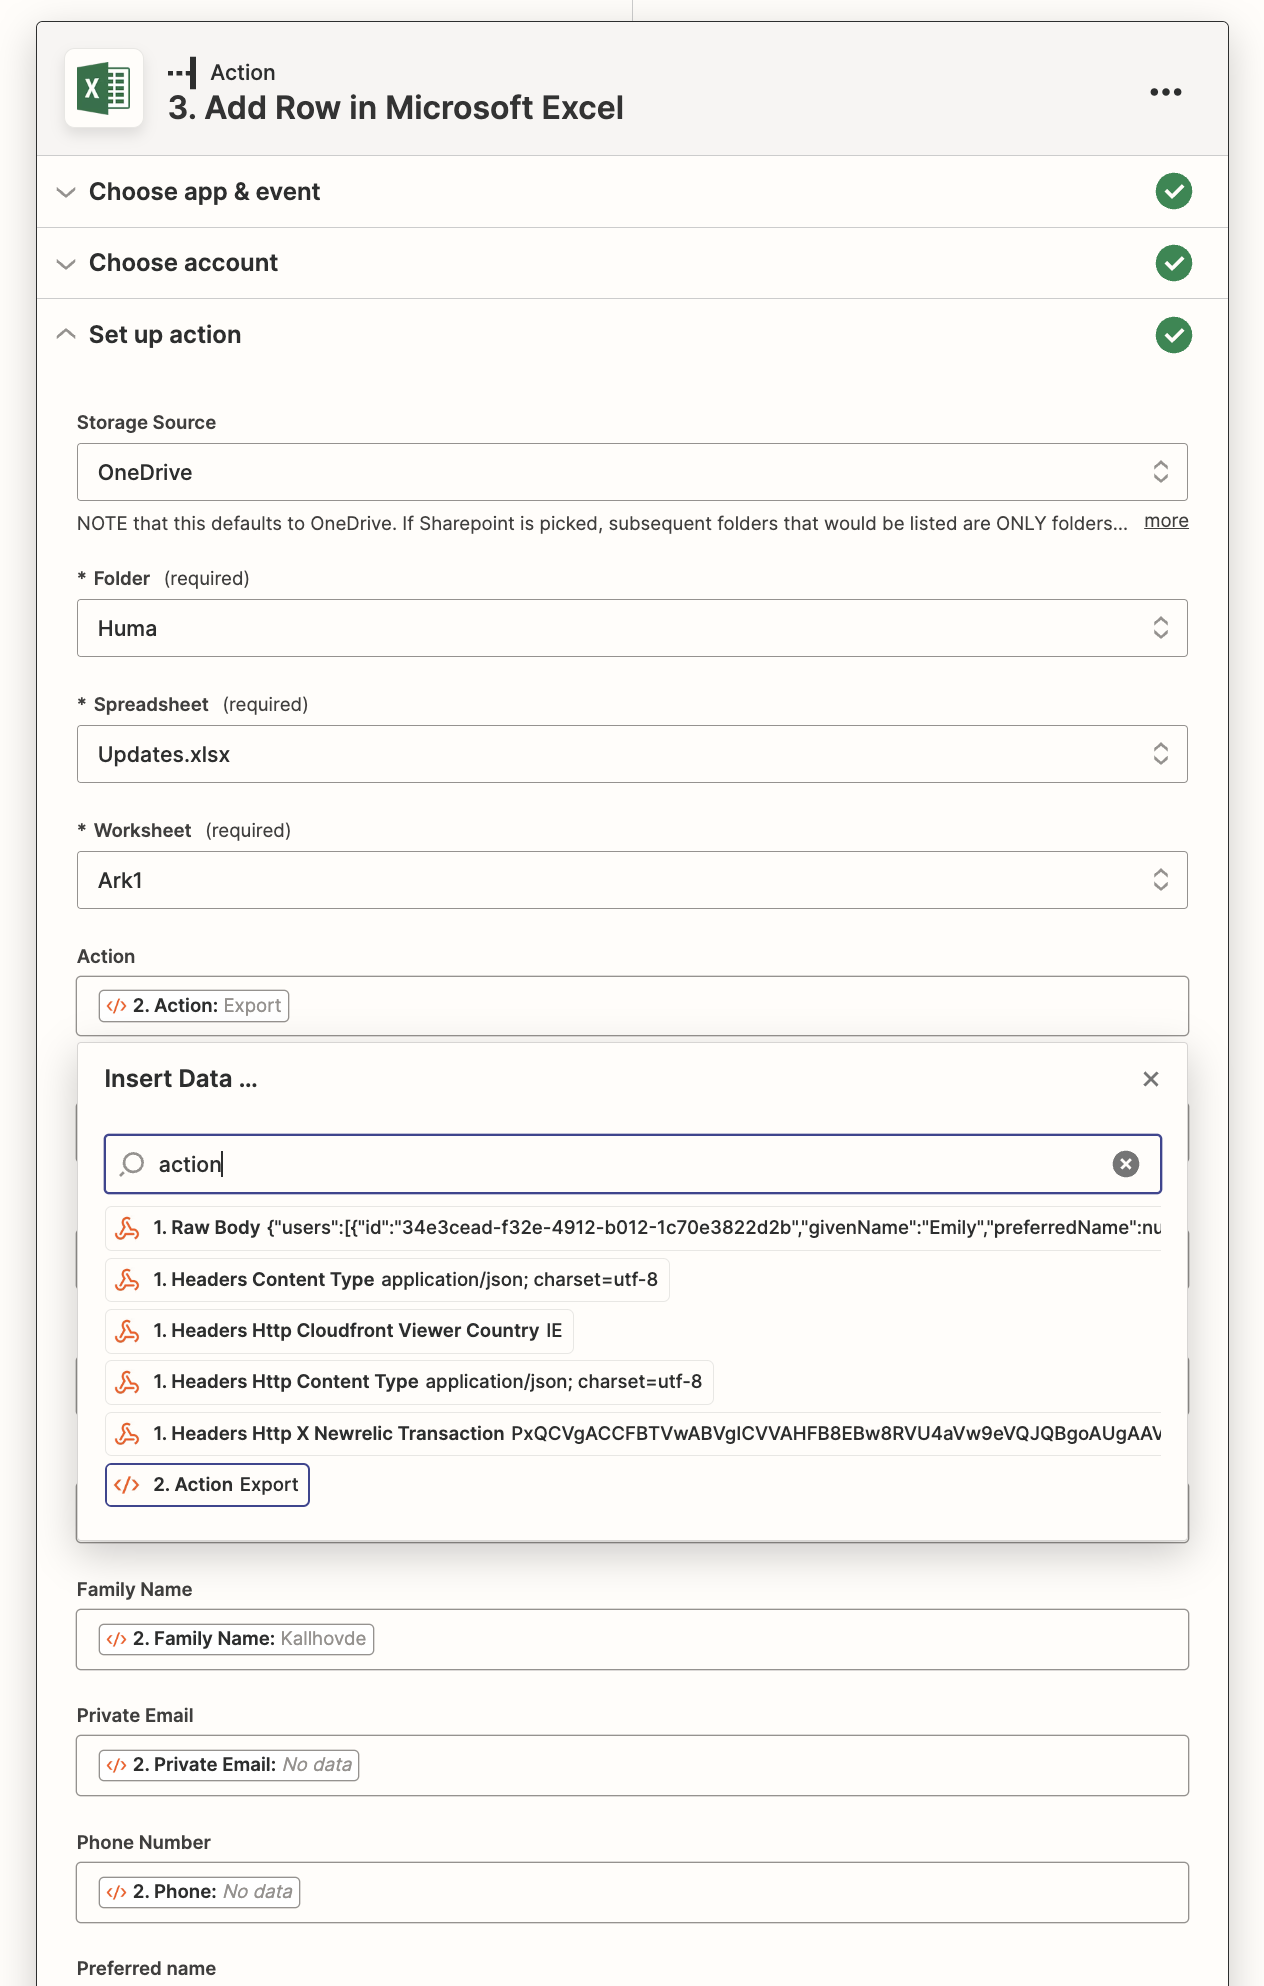
- Under actions you will connect the changes from Huma to the different columns in your Excel spreadsheet
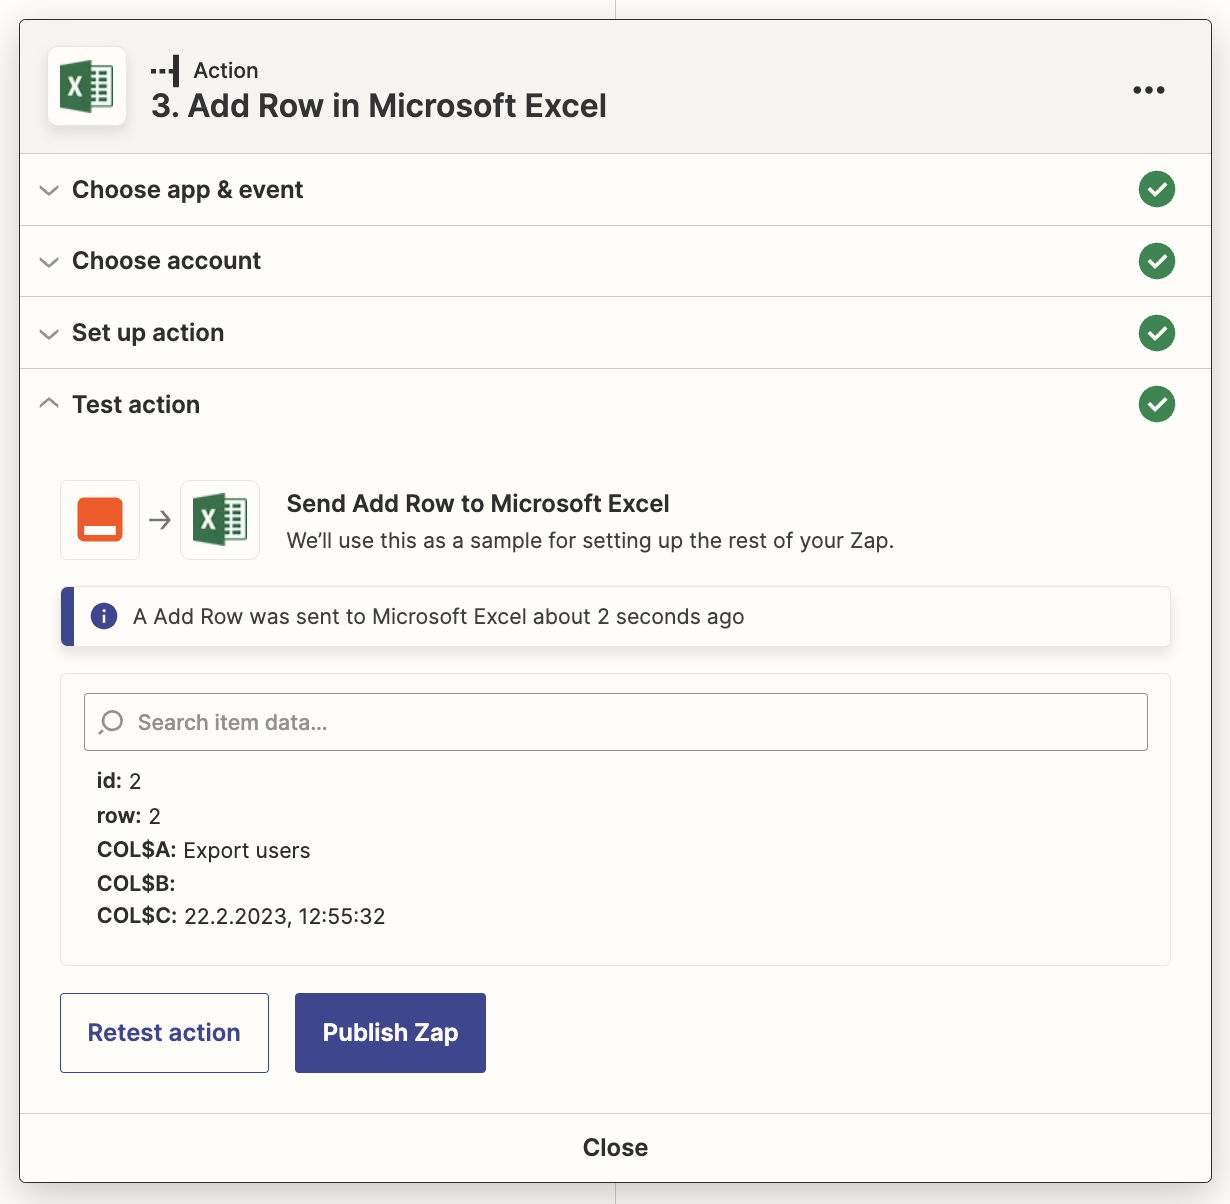
- Test the action and you'll get a response like this:
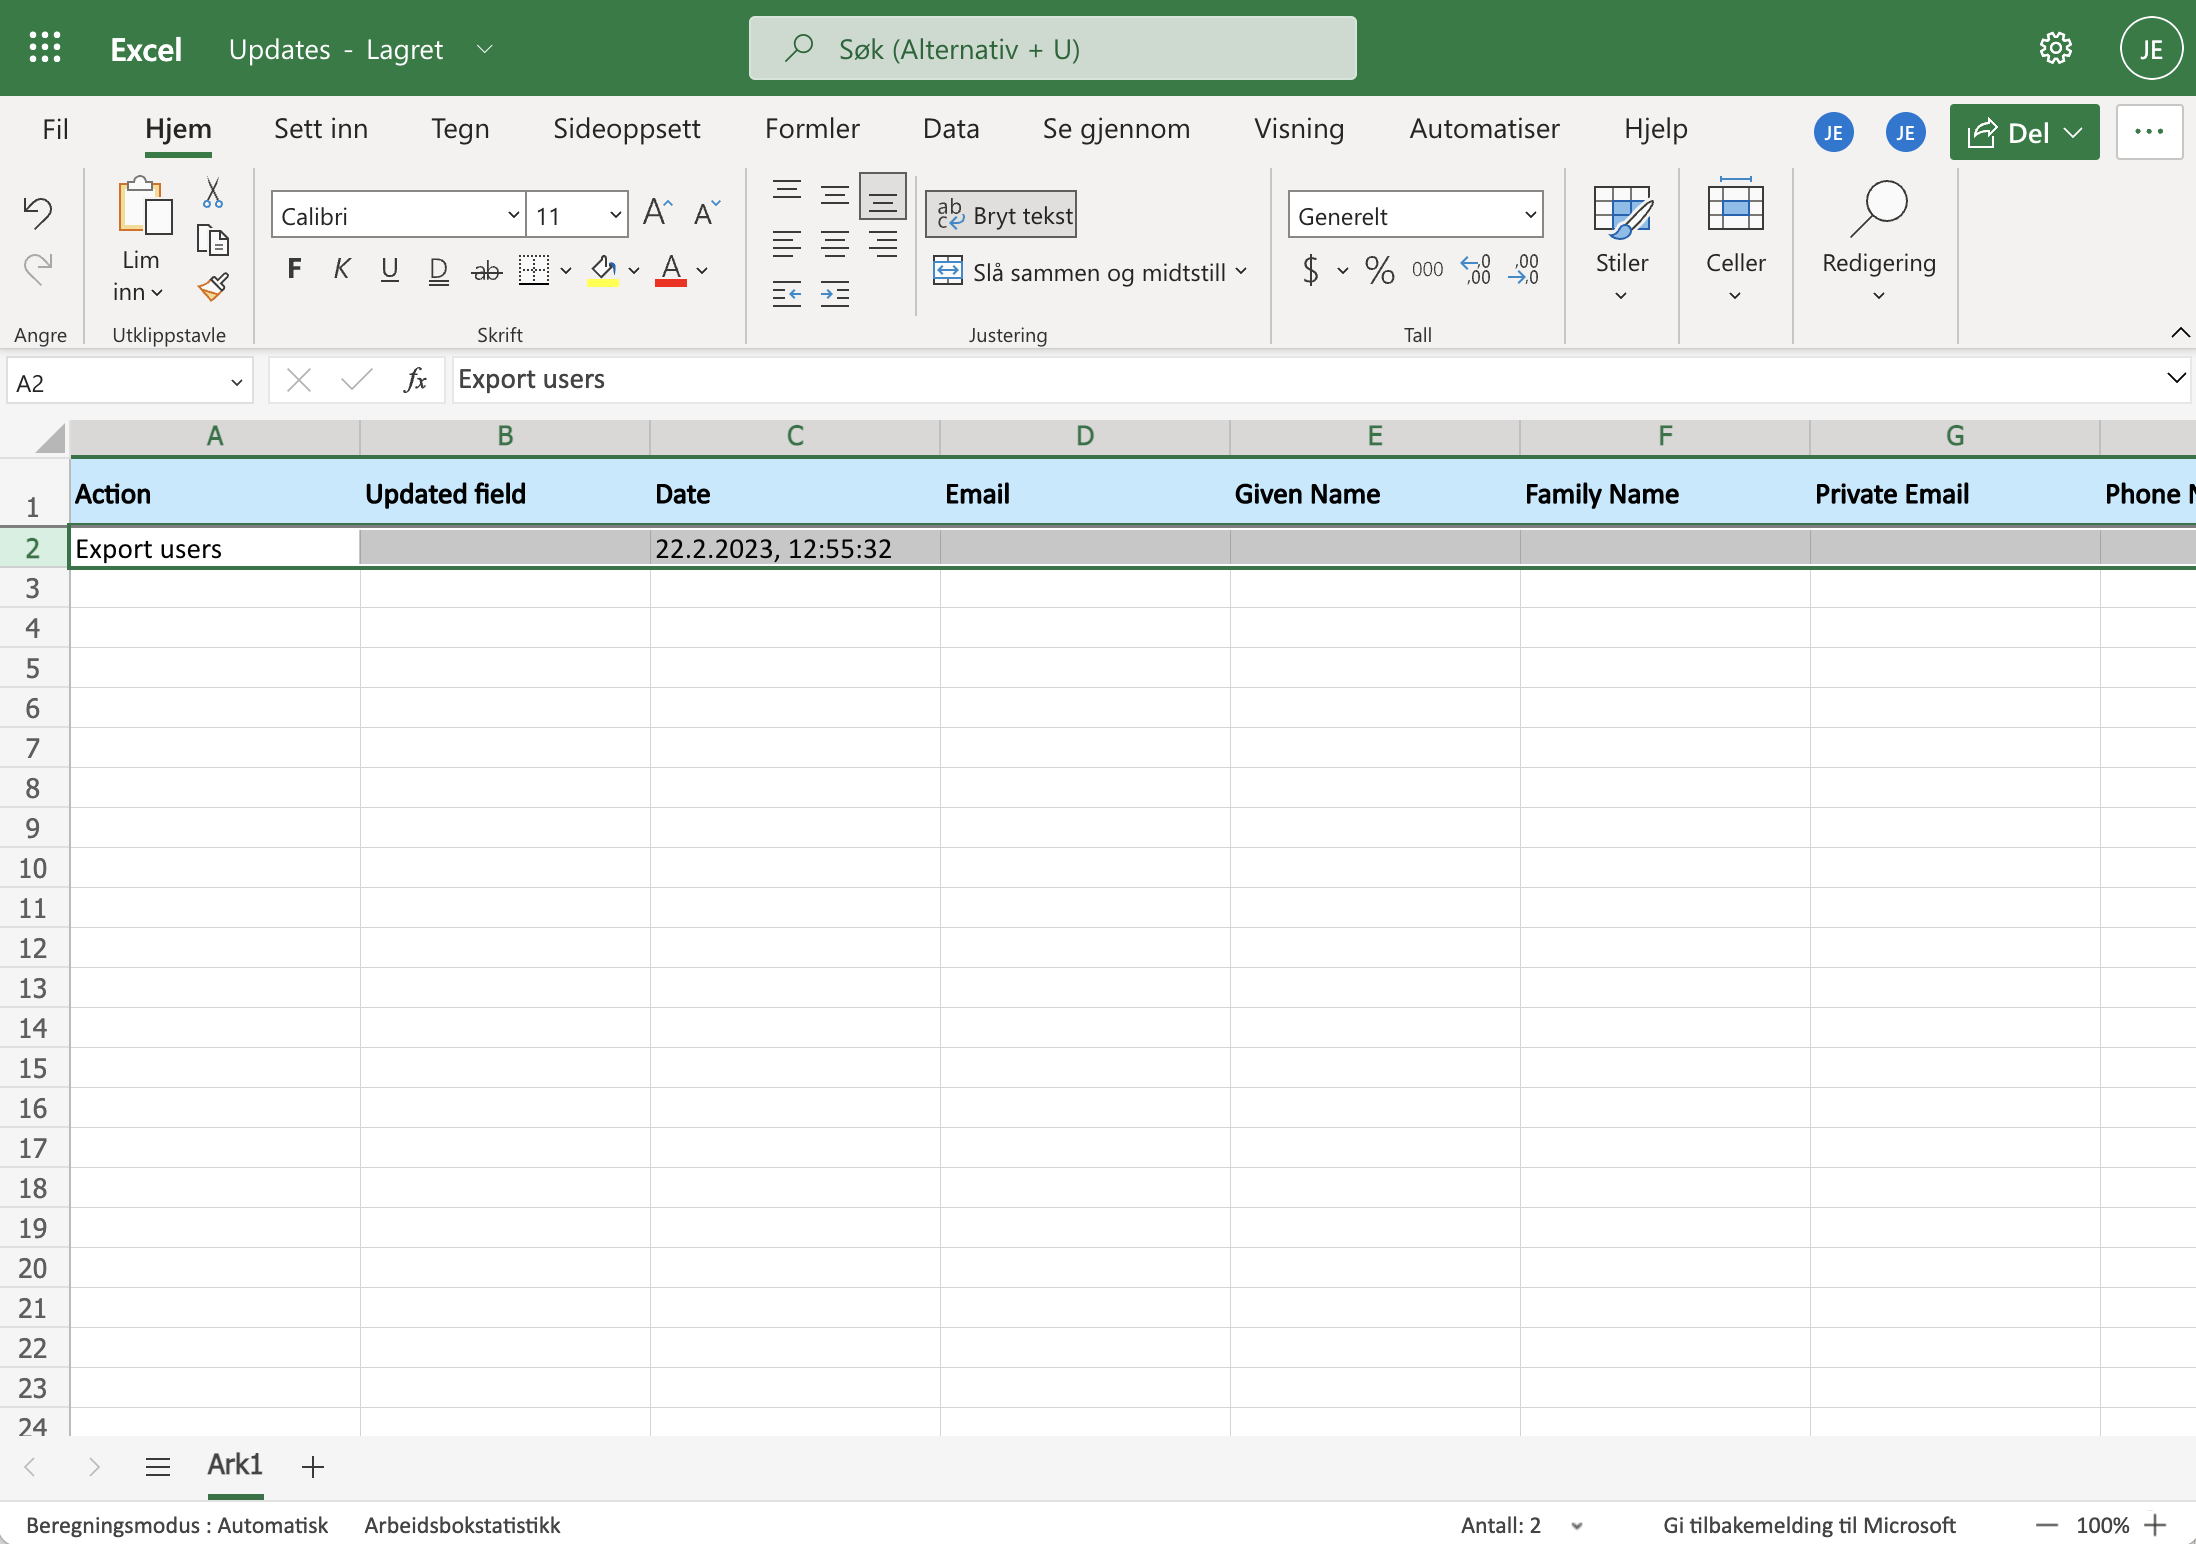
- Head over to the Excel Spreadsheet and verify that a new row has been created:
Step 6: Test the integrations
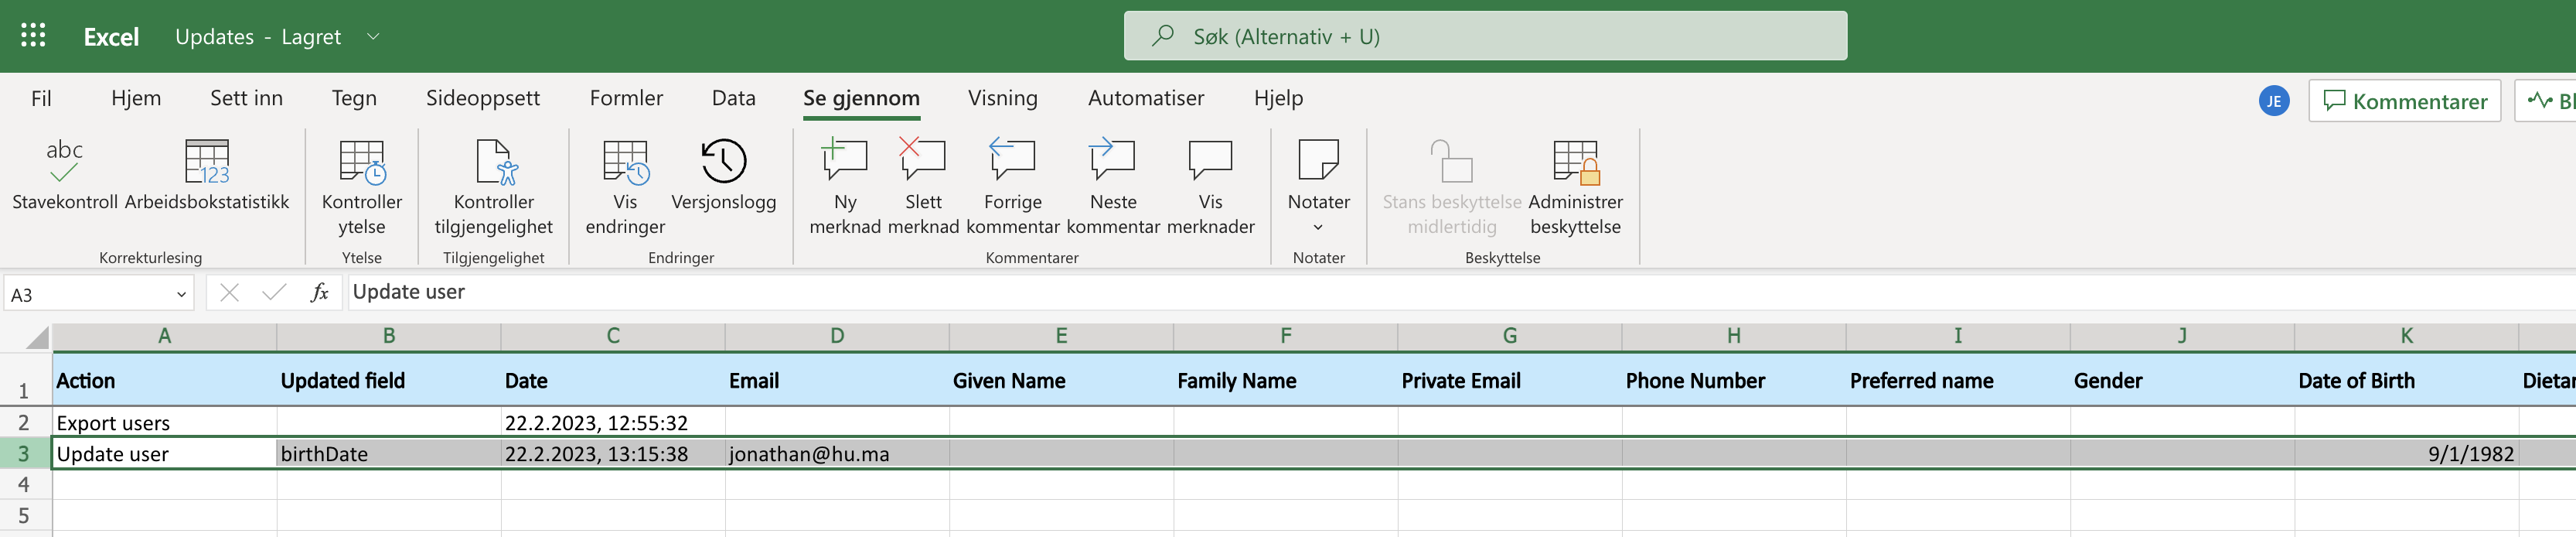
- Now you can go to your own profile in Huma and update your Date of birth.
- The change will appear in the Excel Spreadcheet like this
- Now you're done and you have a changelog! Changes in the profile will now be sent to the Excel Spreadsheet.
⚠️ Important!
This is an example and Huma doesn't guarantee it works.
We recommend having a developer with the technical knowledge to assist you when setting up the Webhook integration.
A Webhook can be used in various situation and this is just one example. You can read more about Webhooks and what is supported here.