- What is "Custom profile field"?
- How to create a Custom profile field?
- Field types
- Field information
- Export
- Webhooks
- Which role do I need to handle this feature?
What is "Custom profile field"?
A "Custom profile field" is a customizable field that allows you to add specific information about employees that is not covered by the predefined fields in the system. This feature enables the recording of unique data that is important for the organization but not included in the standard fields.
Some examples are:
- Shirt size
- Medical information
- License plate
You need Enterprise subscription to use this feature.
How to create a custom profile field?
- In System settings, click "Custom profile fields"
- Click "Add custom field" below either Intro, Employment or Personal info. What you choose decides where on a user profile the field will be.
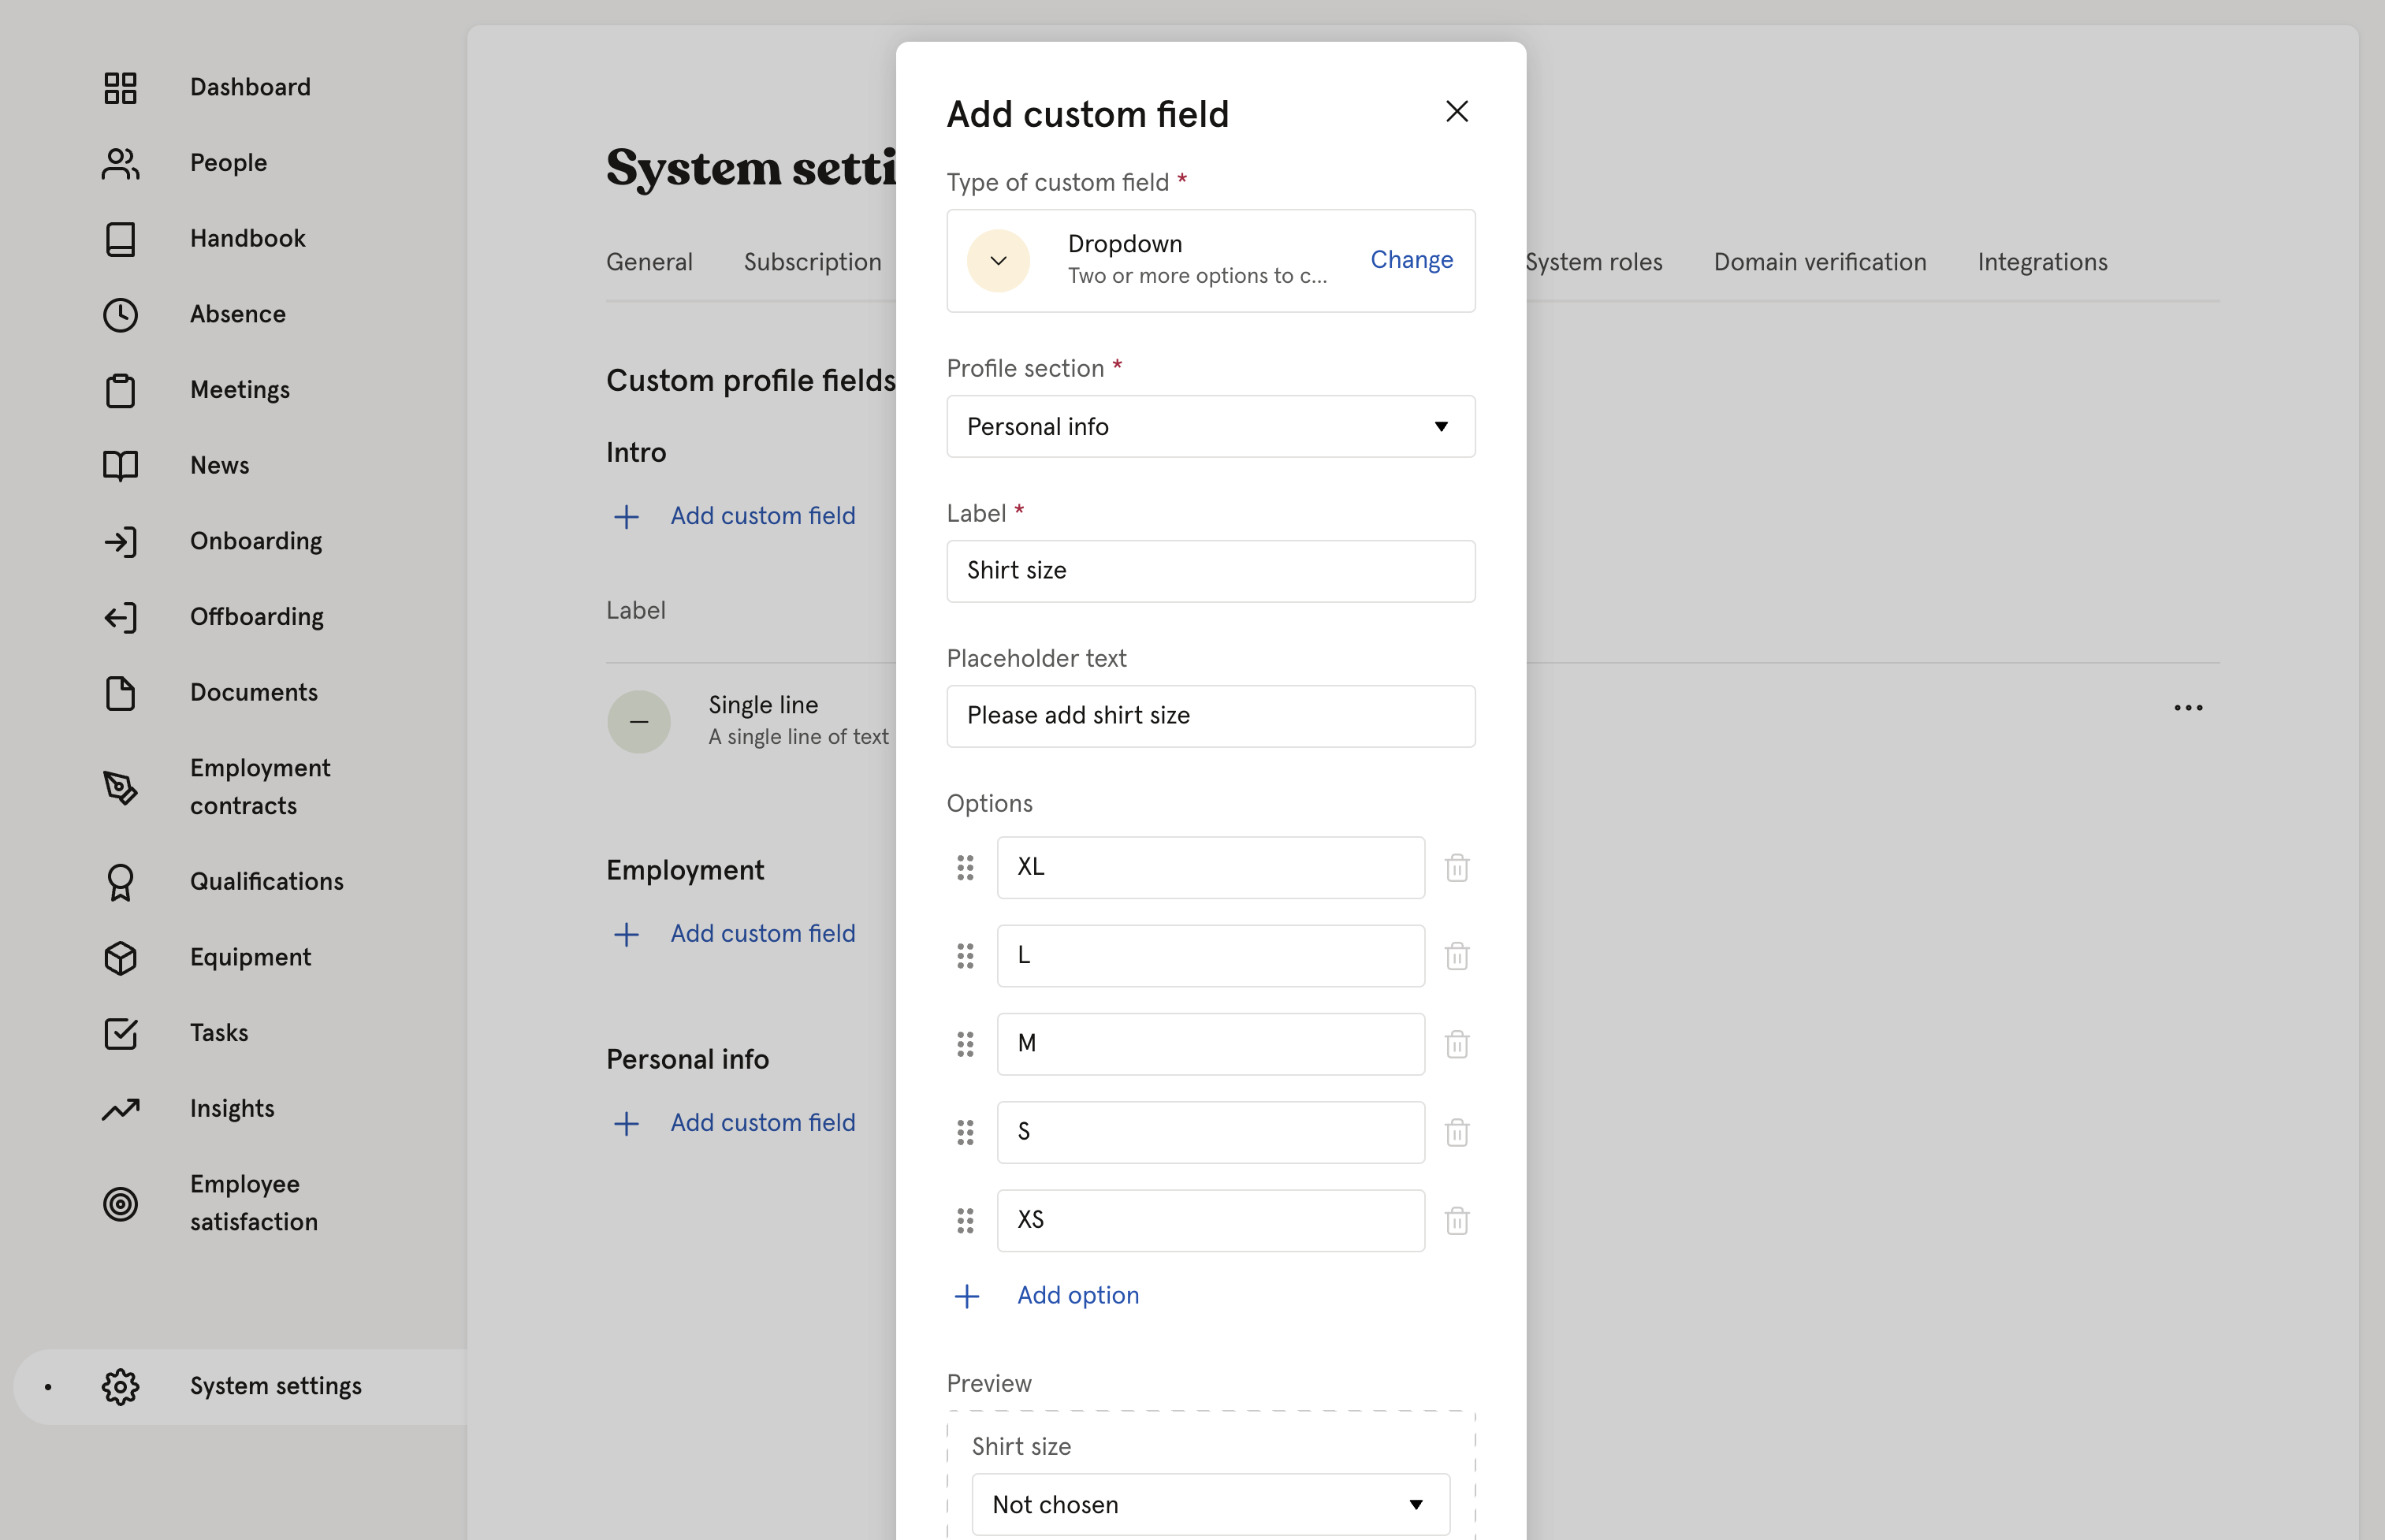
- Choose which field type, and fill out the information needed for the field
- Set up who will have access to the field.
The custom profile fields will be organized in alphabetical order.
The initial sorting will be based on the "Label," followed by a secondary sort on "Name."
Field types
Text - Single line of text. Use this type if the response is going to be a short text.
Textarea - Multiple lines of texts. Use this type if the response is going to be longer.
Dropdown - Use this type if you want to set up alternatives that the employee can choose from. For example, this could be used for Shirt size, where the alternatives is XL, L, M, S, XS.
After adding the alternatives you can change the order of them by dragging the six dots.
Yes / No - Use this field when the response is a Yes or a No
URL - This field will create a link to a website. For example, the employee can add their Linked-profile.
Number - Use this type if the answer will be a full number without decimals.
Number with decimals - Use this type if the answer can be a number with decimals.
Date - Use this type if the answer will be a date.
Field information
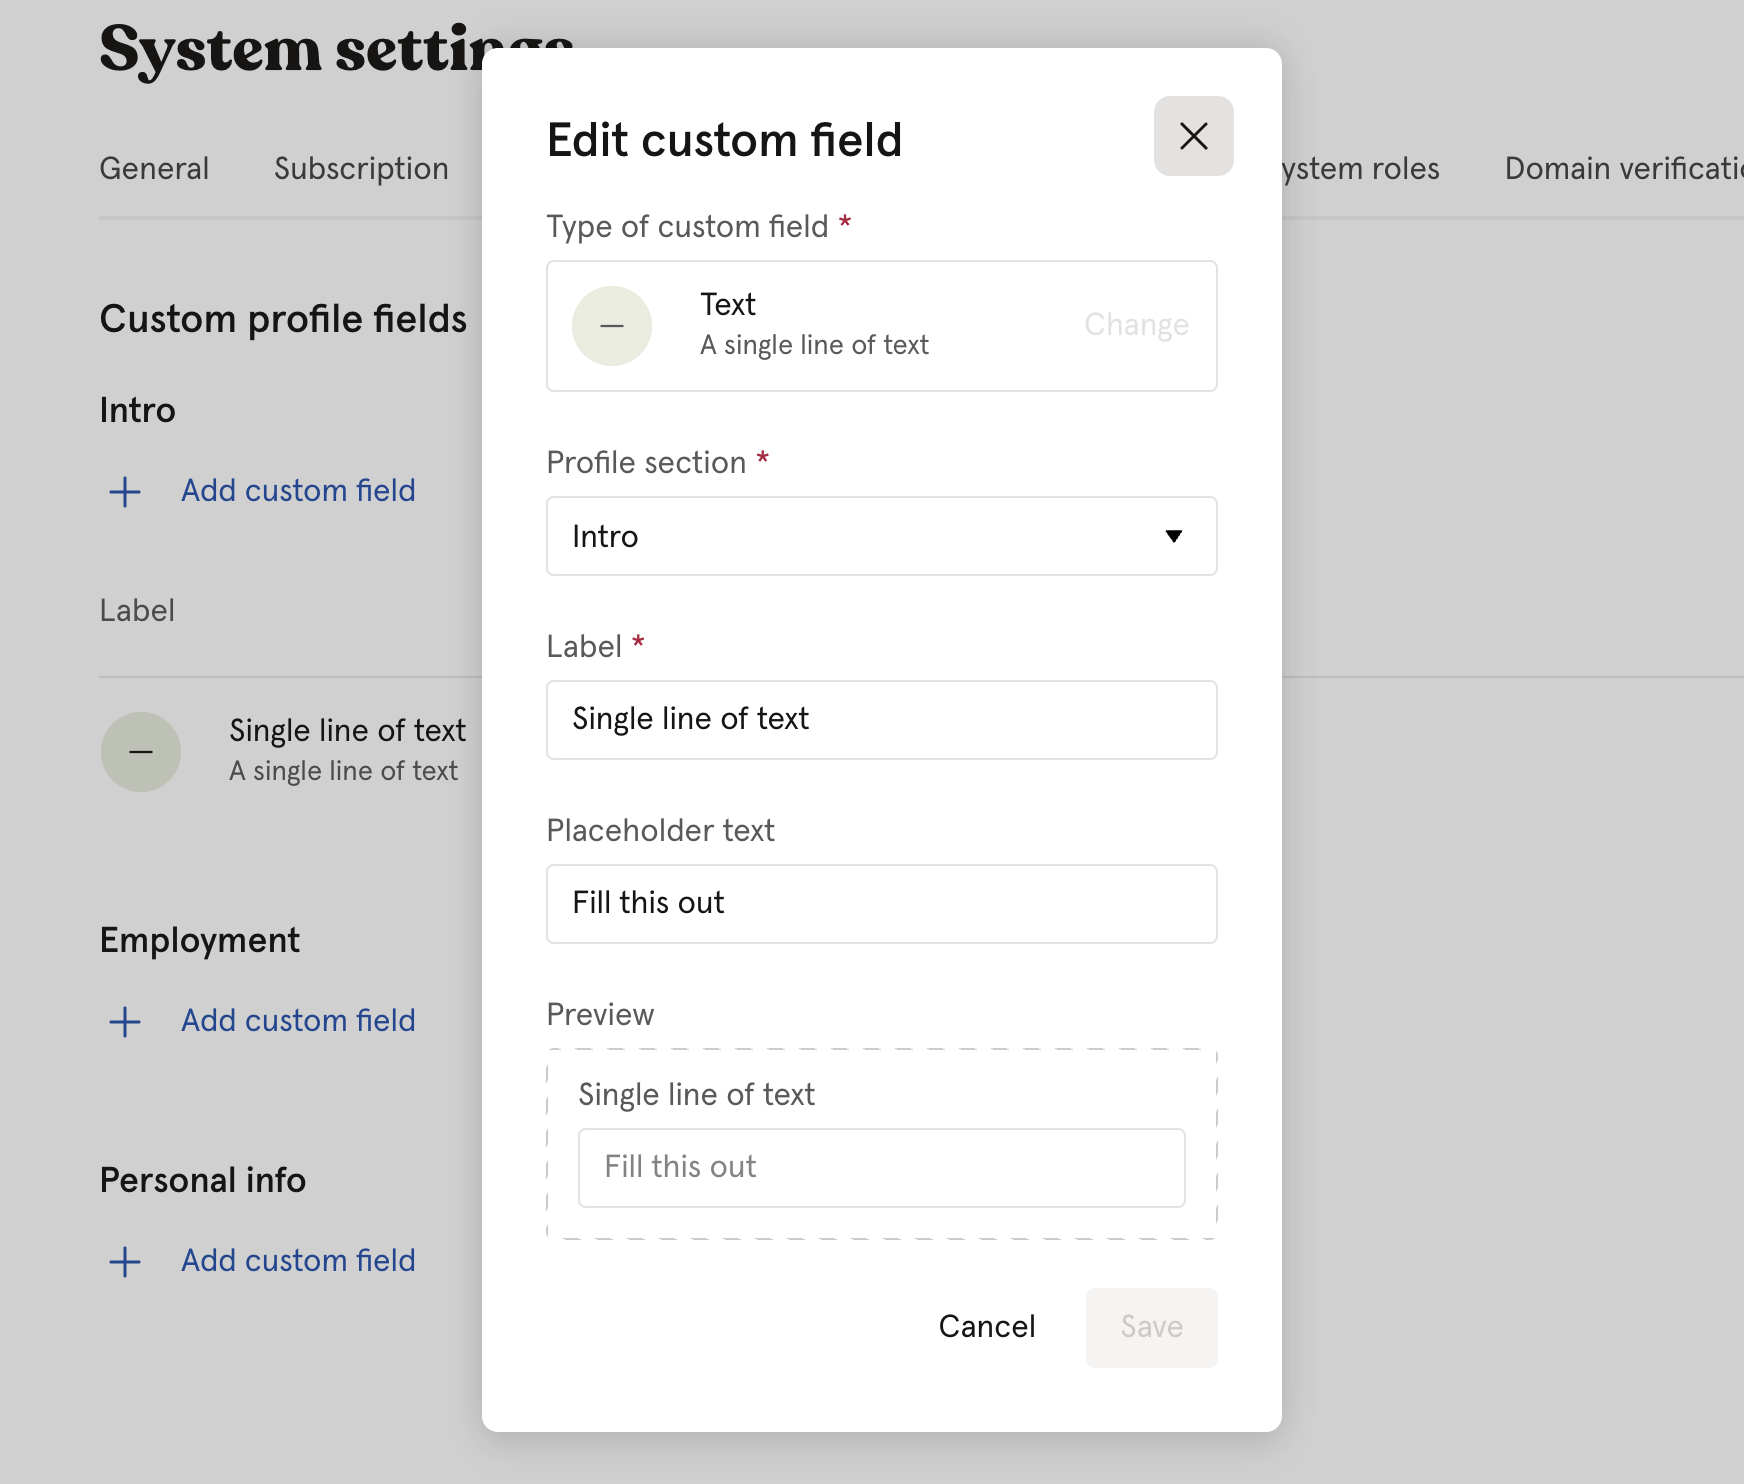
Profile section - Which section on the user profiles the field will be in. Either in Intro, Employment or Personal info.
Label - Basically the name of the field. If 'Shirt size' is the field, then 'Shirt size' would be the Label.
Placeholder text - Grey text to help the employees understand what type of information to fill in.
Preview - A preview of how the field will look on a users profile.
Set up access to the field
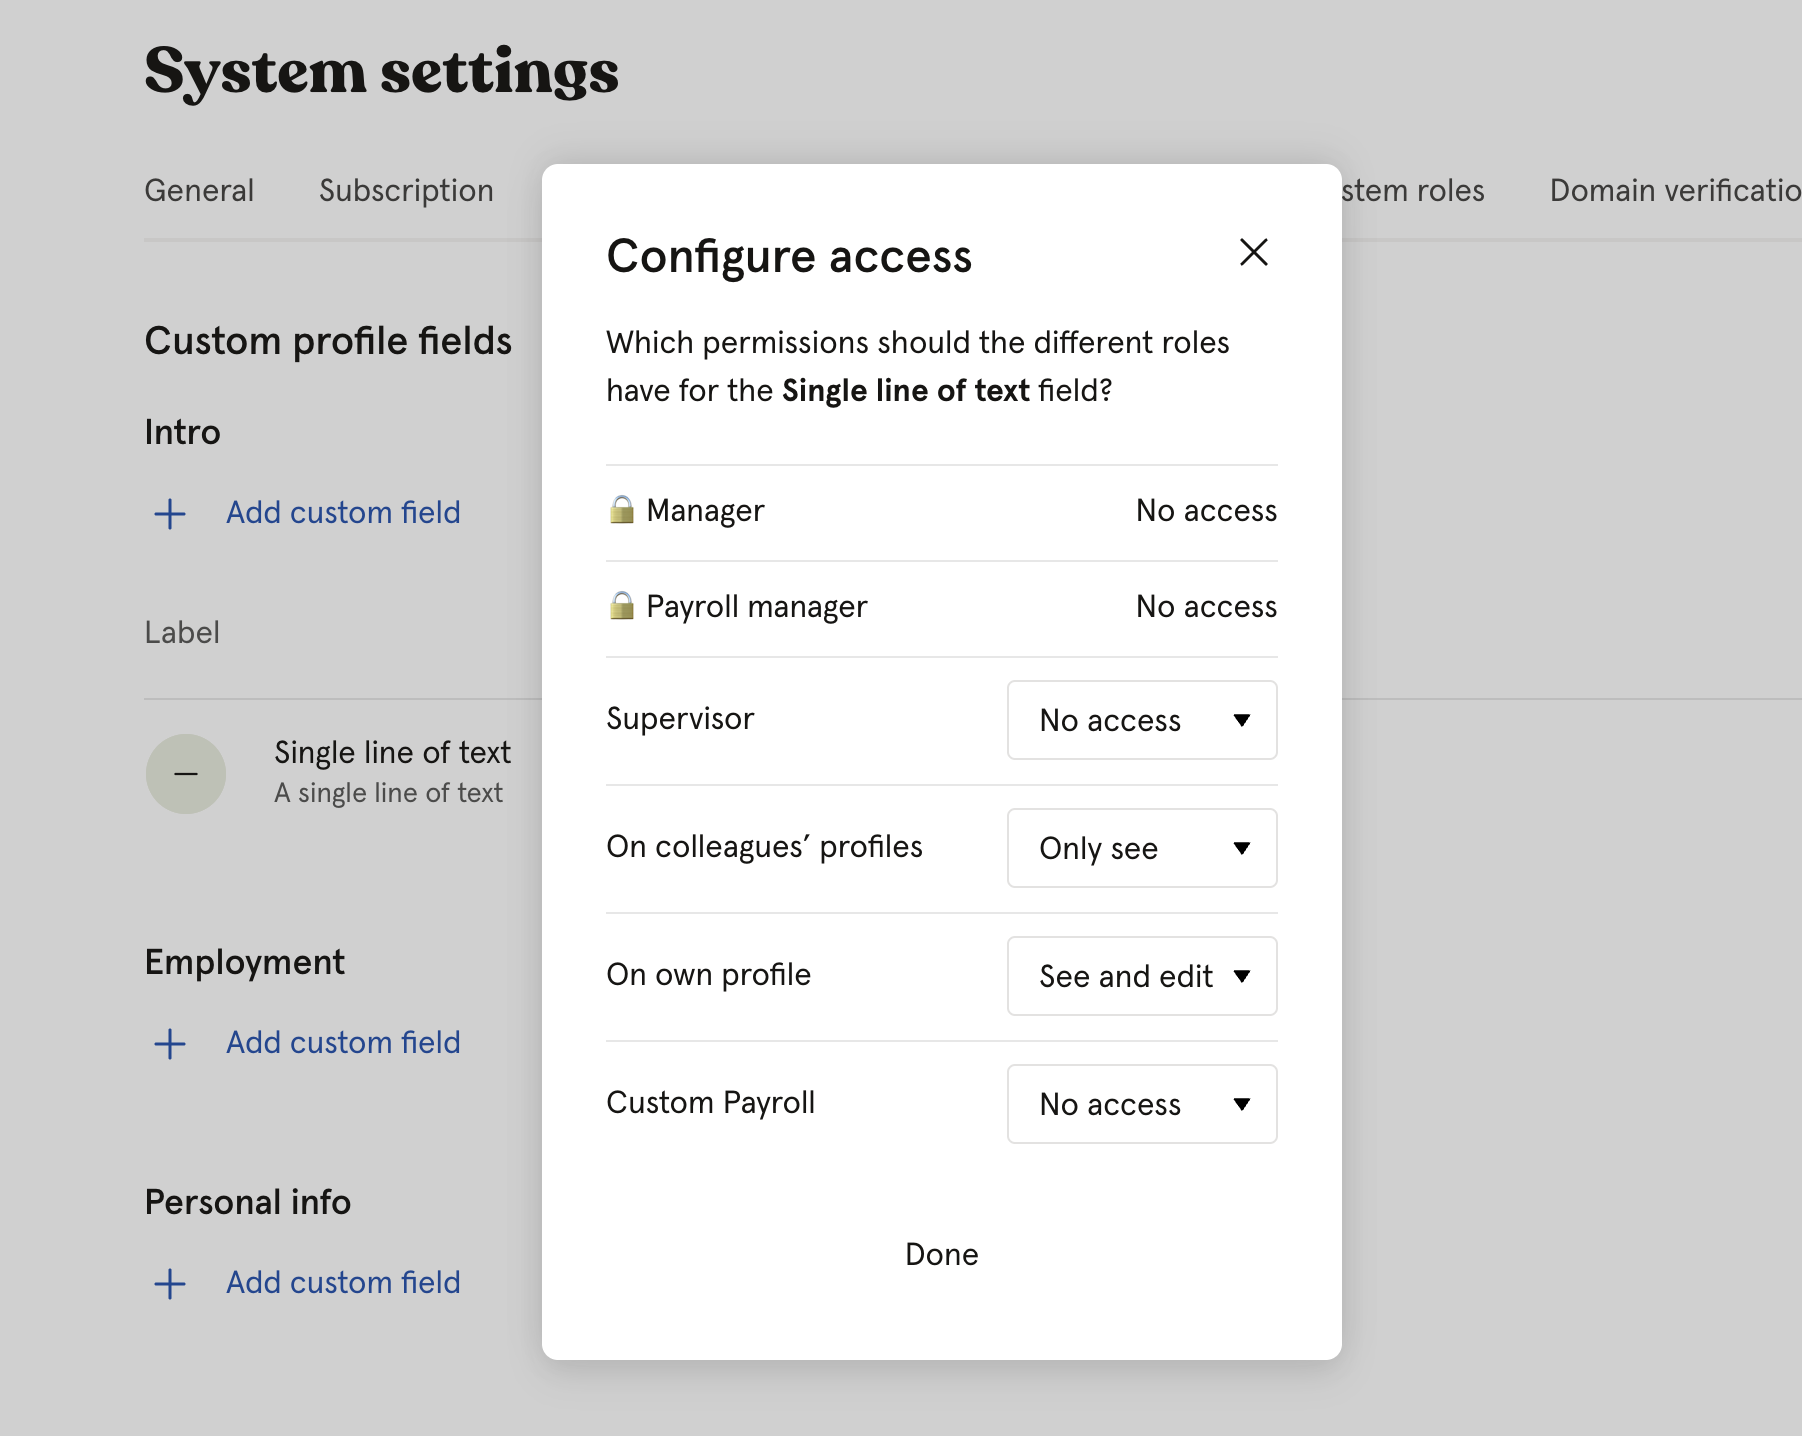
The last step is to set up who should be able to see and edit the field on the users profile.
A permission will be added for each custom profile field on every user role, so you can also navigate to System settings -> User roles to manage the access.
If you use Huma's Manager or Payroll manager roles and want those people to have access to the field, you need to create custom user roles and assign people to those roles instead.
Export
All custom profile fields will be included in the user exports.
Webhooks
All custom profile fields will be included in Webhooks using the unique parameter that is assigned to the field. In the case below it's 'singleLine'

The system permission 'Custom profile fields' is needed, which are included in the default 'System admin' role.